Wednesday, August 28, 2013

Slow and not so steady: WIP Wednesday

Where did the week go?  And what happened to summer?  Earlier tonight it was rainy and horribly windy--it sounded like mid-October outside, and now the temperature has dropped significantly.  I'm hoping we'll still have some good weather, but at the moment it really seems as if Vancouver's short summer has already come to a close, a good two weeks earlier than usual.

The day job kept me much too busy this past week, so I didn't have nearly as much time for sewing as I would have liked.  I did manage to make a little progress on my heron quilt, by starting work on the upper left corner.  I hadn't done any paper piecing in years, but the technique seems made for free form flying geese.  I also thought the quilt would be monotonous if I stuck to blue fabrics, so I'm starting to throw in some flecks of red.  Here's this week's piecing:


And here's what the creative process looks like on my new design wall, combined with fabric chaos in the foreground:


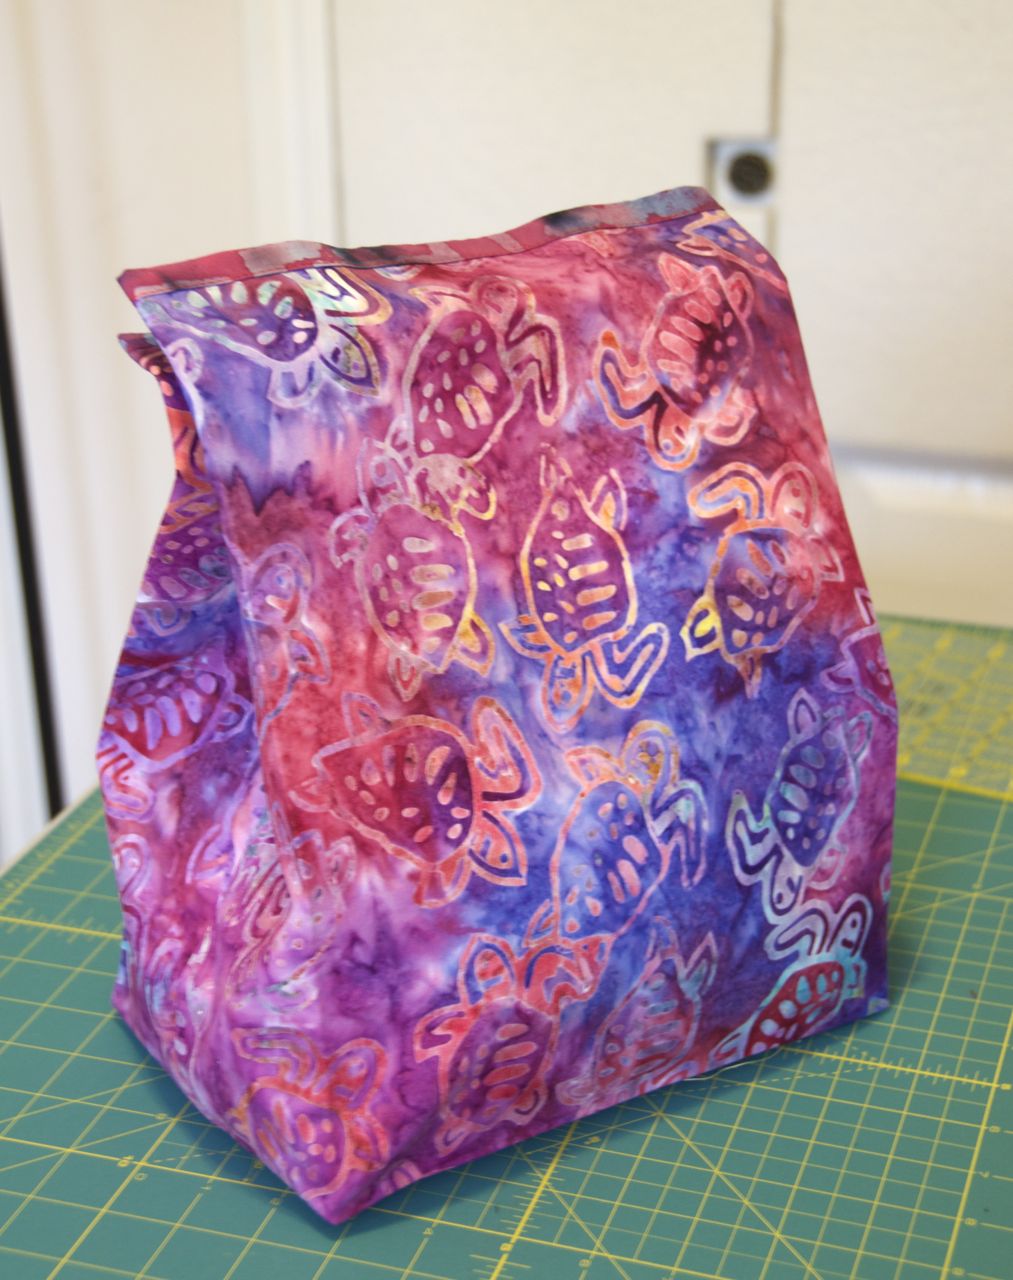
I also had fun making a fabric bag for scrap storage, as part of my ongoing drive for organization.  It certainly beats the plastic shopping bags that I usually use:


Happy sewing, and may all of your WIPs bring you creative energy and enthusiasm!

Monday, August 26, 2013

The final tally

Plum season 2013 has come to a close.  The final count: 207, give or take a handful.  That's well below last year's crazy bumper crop, but still an excellent harvest for our one little tree.

Here in Vancouver, the weather is already cooler and cloudier, the days are noticeably shorter, and the start of a busy semester is looming.  Fall is just around the corner, but I will hold onto summer until the bittersweet end.

Thursday, August 22, 2013

What's big, orange, and furry, but smaller than a breadbox?

Our younger cat!

Actually, I can't say with absolute certainty that she's smaller than a breadbox, but at least she's smaller than a breadbox box:


Tuesday, August 20, 2013

Studio Makeover, Part IV: Design Wall

I wish I had a fully finished sewing room to show for the Sewing Studio Spotlight, but my studio makeover is still a work in progress.  Most of the major elements are in, however, although I'm still waiting for those darned floating shelves to arrive.  (I think they may have floated out to sea or something!)  Here's my newly completed design wall, which I just finished putting up today:


I've never managed to find room for a design wall and have instead made do with beds, tables, and floors for years.  My studio has limited free wall space, but I realized I could hang small design boards from the folding door of the closet in addition to using the space next to the closet door.  This design board triptych, made from 3/4" thick insulation foam covered with quilt batting, isn't huge, but it's big enough for my wall quilts, which are rarely larger than 40" high x 60" wide.  The two panels on the door are each 14" wide x 48" high, while the third panel is 38" wide x 68" high.

Lest you find my studio sterile in its uncluttered glory, here's a more honest angle:


Two weekends ago, I also replaced a pile of cardboard storage boxes with an Antonius drawer/basket system from Ikea, along with a much smaller pile of cardboard boxes:


I have another drawer set that can be stacked on top of the first one, but for now, I'm going to stick with the current arrangement, since I like having the open space beneath the wall cabinet.  Eventually, I'll make a fabric cover for the wire baskets, and I'll place washi paper on the inside of the glass doors to protect my fabric from light.  I would have preferred solid doors, but unfortunately, Ikea doesn't make them in that size.

Alas, I haven't made any quilting progress lately, but at least the design wall is getting some use, and the quilt on the left should get some attention in the upcoming week.   I'm linking up to the Studio Spotlight at Ellison Lane, The Needle and Thread Network, and later, to WIP Wednesday at Freshly Pieced.  If you want a more complete view of my studio and the state of the makeover thus far, please check out the following links:

Studio Makeover, Part I: The Semi-Before Photos

Studio Makeover, Part II: The Waiting Game

Heron quilt: WIP Wednesday

Studio Makeover, Part III: Organization

Happy quilting, everyone!

Friday, August 16, 2013

Smoked Spanish Paprika Chicken Stew

 
A couple of weeks back, I had planned on making pork cutlets, tonkatsu style, but the neighborhood grocery where I like to shop didn't have any pork.  There was plenty of chicken, however, and I knew I had a lovely, fragrant tin of smoked Spanish paprika at home, so I started dreaming up a chicken stew, with paprika as the main seasoning.  Here's the recipe I came up with:

Smoked Spanish Paprika Chicken:

Ingredients:

1-2 Tbs. butter
6 chicken thighs
1 medium onion, chopped
1/4 c. red wine (or white)
3/4 c. chicken stock
1 can chickpeas (drained and rinsed)
1 bay leaf
1 scant tsp. smoked Spanish paprika (pimenton)
1 tsp. oregano
pinch of cayenne pepper
salt and pepper to taste
1/4 c. finely chopped parsley

Rinse chicken pieces and pat dry; sprinkle w/ salt and pepper on both sides.  Heat butter in a skillet and brown chicken on both sides (in two batches if necessary).  Remove chicken from pan and set aside.

Remove some of the chicken fat in the skillet if the amount seems excessive, but leave enough to saute the onions.  Add chopped onion to the skillet and lightly brown (5-7 min.).  Add the pimenton to the lightly browned onions and saute for 30 seconds or so.  Add the wine and deglaze the pan.  Return the browned chicken to the pan and add chicken stock, bay leaf, oregano, and cayenne.  Simmer, covered, for 30-40 min. until chicken is fully cooked.  In the last 10-20 min. of simmering, add the chickpeas. 

If needed, add additional salt and pepper to taste.  Stir in chopped parsley at last minute and serve.  Enjoy!

Tuesday, August 13, 2013

Studio Makeover, Part III: Organization

As the floating shelves I ordered find their way to Vancouver, I've been working on other aspects of my studio makeover.  I like modern interiors with clean lines, minimal clutter (more aspiration than reality in my life!), and a place for everything.  I don't mind all manner of creative fabric chaos while there's work in progress, but I want to be able to store things away when finished and start anew with a clean slate on the next project.  For that to happen, in addition to new cabinetry and shelving, my ideal sewing room will also need all manner of storage boxes, bins, canisters, and other containers, so that I can put all of my supplies in order.

In my 10' x 11' sewing room, I have to think about how to exploit every square inch of space.  In order to put away some clutter that's been leaning all-too-visibly against a wall for a few years, I used an old sheet to make a sling.  It now hangs from the back of a door as part of my behind-the-door storage for an extra cutting mat, random bits of tag board, and some boxes:


There are also a few boxes and other items leaning on the wall just to the left of the door.  But with the door open, as it almost always is, everything is nicely hidden away:


For above-cabinet storage, the original plan was to go out and buy some nice boxes, but then I started feeling guilty.  I sew--shouldn't I make them myself?  There are excellent on-line fabric box tutorials (e.g. here and here), and as a start, I came up with this pencil box-sized prototype:


Finally, I did a little trolling around the web for insights about my likes and dislikes.  The quilt studios that appeal the most to me have light colored walls and ceilings, lots of natural light, wall space, and plenty of cabinets, drawers, and other storage to tuck fabric and other supplies away while they're not in use.  Here are links to a few favorites:

Fellow VMQG member Terry remodeled her studio last year and produced a great example of clean and efficient design in a tight and difficult space.  She's been reorganizing more recently as well--for details, click here and here.  Since I also have a relatively small studio, her approach offers enormous inspiration.

I can only envy Carol Taylor's 1570 square feet of space.  For photos of her gorgeous studio, with its multitude of windows, high ceilings, and generous closet space enclosed with large, flannel-covered sliding doors that serve as design walls, see here.

Selvage Blog also works in a wonderful, open, and brightly lit space with plenty of room to hang quilts.  She seems to have a lot less fabric than I do: she must be remarkably self-disciplined!

A builder in Missouri posted photos of a terrific garage conversion.  I love the storage cube unit with all of the bright fabric-covered drawers--it makes the space so lively and eye-catching.

By chance, it turns out that Ellison Lane and The Sewing Loft have also launched a series of Sewing Studio Spotlights that are well worth a look, so stay tuned to both blogs over the next week or so.

I had hoped to show off the heron quilt's progress on a spanking new design wall, but the latter is still a few days away, so the evolving quilt top is lying on my cutting table at the moment.  I'm not entirely sure where I'm going with this quilt, beyond an invocation of flight, water, and movement, and maybe a view through a window, or a series of moments caught on film:


It's still Tuesday night here on the west coast, but I'm linking up to WIP blogs on Freshly Pieced and The Needle and Thread Network.  Happy WIP Wednesday!

Monday, August 12, 2013

And today's number is...

113!

That's how many plums we've harvested as of this evening.  There are still a few dozen on the tree, but plum season is definitely well past its peak.  It looks as if this year's harvest will be in the range of about 150-180 plums, far below last year's bumper crop, but much more in line with the amount we can actually eat.

Plums, anyone?